Mama Ducky's Kitchen Store

Tuesday, November 29, 2016

A Full Dehydrator Kind of Day

I have been procrastinating on my dehydrating projects and things were starting to pile up, so the other day I decided to bust out my heavy duty Excalibur dehydrator and catch up on some dehydrating.
The good thing is that most of the stuff I needed to dehydrate could all be done at the same temperature.

Every time I pull out my dehydrator, I typically only use 3 or 4 of the 9 trays at a time, but this time around, I filled up all 9 trays. And when it was all done I felt so proud of myself for accomplishing that much dehydrating in just a few hours :)
That is one of my most favorite things about my Excalibur, the fact that I could do a lot of dehydrating all at once, as opposed to my old dehydrator that only had a small capacity.

Here's what I filled my dehydrator with:
PUMPKIN PUREE
It was time to "get rid" of the pumpkins that the kids decorated back in October. And when I say "get rid", I meant, puree and dehydrate into pumpkin powder for recipes I could use during the winter months :)
I only had the one pumpkin left, but I couldn't believe how much puree it gave me. I didn't dehydrate everything, as I was thinking of using them in recipes in puree form as well (I'll post about these recipes next time)
CARROT PUREE
Not too long ago carrots were on sale for 3 lbs for $1 and since my carrot powder stock was running low, I decided to stock up while carrots were on sale. I peeled and steamed a bunch of carrots, then pureed them in preparation for dehydrating them and turning them into powder.
DEHYDRATED BANANAS
We had some over riped bananas that had to be used. Of course I could have gone the banana bread route, but I thought it would be great for variety to make some banana snacks. All I did was cut the bananas in thin slices, and arranged them on the tray to dehydrate.

FRUIT AND VEGGIE LEATHER
As it happens, I also had a bunch of home made yogurt that I had to use up, so I decided to make two kinds of fruit and veggie leather while I had the dehydrator out (I'll share this recipe in another post soon). I couldn't believe how fast my kids ate up these fruit and veggie leathers up. It was gone so fast that I had to whip up another batch the following day....hahaha...

This post may contain affiliate links

Monday, November 14, 2016

Pumpkin Chocolate Pretzel Rods

Since it is pumpkin season, I have been into making various pumpkin themed snacks for my kids.
But since they wouldn't normally eat pumpkin as-is, I have to get a little creative to add pumpkin or other healthy ingredients into recipes I know they will like.

Melting chocolate was on sale at our local store so I came up with the idea of making some chocolate pretzel rods with a healthy twist. This is yet another super simple recipe that is sure to be loved by little kids and adults...I have yet to meet someone who doesn't like chocolate :p

All you need is 3 ingredients (melting chocolate, pumpkin powder, and pretzels) and chocolate pretzel rod molds. Please don't mind my "i love you" and "flower" molds. I realize that they don't quiet match the Pumpkin/Thanksgiving/Christmas theme and season...I seriously need to update my kitchen molds/ tools collection :p

The beauty of this treat is that you can customize it for any season or event, with all kinds of molds you can use, such as Christmas trees, flowers, or even race car chocolate pretzel molds which would be great for boys birthday party favors.


First, I microwaved some melting chocolate to the right consistency. Note that the length of time required to melt the chocolate may vary depending on how much chocolate you put in the bowl and what kind of microwave you have. For me, 1 cup of melting chocolate melted in about 90 seconds. I checked every 30 seconds to make sure it isn't burning, and to give it a quick stir. after the 90 seconds, there were still little chunks of chocolate, but when I stirred it around, I was able to get everything thoroughly melted and mixed together. Alternatively you could also use a double boiler to melt your chocolate.


Next, I added the pumpkin powder into the melted chocolate and stirred well. If you are a little unsure about whether or not your kids will like the taste of pumpkin in their chocolate, you could definitely try it first with a smaller amount of pumpkin powder. For my kids, they didn't even notice it was in there and they ate up all those pretzel rods as fast as they would have eaten regular ones without the pumpkin powder in it. After mixing in the pumpkin powder, I also noticed that there wasn't much of a color difference compared to the chocolate without the pumpkin powder, which is awesome because my kids couldn't even tell visually that it is in there. My oldest was excited at the sight of chocolate that he just started dipping his finger into the mixture and licking it...It was all I could do to keep him from eating all the melted chocolate by the handful :p

Next, I spooned a layer of the melted chocolate mixture into the molds. I do this to add a nice pool of chocolate for the pretzel rod to sit in. After I added the pretzel rod, I then spooned over some more melted chocolate to cover the top and sides of the rod.
If you plan to make a lot of these, I would highly recommend getting several molds. I only had one mold at the time, and it definitely took a while to make everything because I had to stop after every 3 pretzel rods to give the chocolate some time to set. I put mine in the freezer and let it set for about 5 minutes before transferring them into the fridge.

When everything was all set, I put these pumpkin chocolate pretzel rods to the test by presenting them to my tiny taste testers. I wasn't surprised that they were super excited for the chance to eat chocolate. My one and a half year old, though, had a light bulb moment when he discovered that he didn't "have" to eat the pretzel part of the chocolate pretzel rods. As a result, I found pretzel rods around the house with the chocolate coating gnawed off....hahaha...oh well, i take solace in the fact that he enjoyed his pumpkin snack :p

Pumpkin Chocolate Pretzel Rods

1 cup melting chocolate
1/2 tsp pumpkin powder
Pretzel rods
Molds
Melt the chocolate in the microwave or double boiler. Stir in the pumpkin powder. Spoon in a layer of the chocolate mixture into the mold, then place a pretzel rod into the mold, and cover the top and sides of the rod with more of the chocolate mixture. Freeze or refrigerate until set.

Here is a printable version of the recipe

If you like my posts and recipes, feel free to share them with others, and if you click on my product links above Amazon may give me an ity bity commission, which helps me continue to share these recipes and ideas with you for free :)

Also, check back frequently for my weekly posts, where I share other ideas to incorporate more veggies into different recipes as well as reviews and discussions on various kitchen appliances or tools that I use the most to make healthier food options for my family.
 
This post may contain affiliate links

Wednesday, November 9, 2016

Veggie Oatmeal Pancakes

One of my kids' favorite kinds of foods are the kinds that they can hold in their hands, aka finger food, and pancakes are a great example of this. I've been making oatmeal pancakes on a regular basis for them, and of course I always find ways to infuse some type of veggie component into it.

This is another one of my recipes that are very easy to put together. All you need is just 5 simple ingredients.
 Start by combining the oatmeal, baking powder, and stevia/sugar in a bowl. Then mix in the egg and V8 veggie blend juice.I absolutely love using V8 veggie blend because it combines the sweetness of fruits with the vegetable-ness of vegetables (hahaha....) and I think it is great to add some extra nutrients especially for picky eaters who may not necessarily want to eat their vegetables as is. In the pictures above, I used the V8 veggie blend purple power (affiliate link), which is what I happened to have in my fridge at the time.
I've made this recipe countless times and have used many of the different V8 veggie blend varieties, such as V8 veggie blend carrot mango or V8 veggie blend healthy greens (affiliate link), all with great success.
Something else that I've also frequently done, is to use some left over veggie/fruit smoothies such as my Orange Vegetable Smoothie or my Spinach Mango Smoothie in place of the V8 juice for the liquid portion of the recipe.

Once the wet and dry ingredients are all mixed together, all you need to do is cook spoonfuls of the batter on a heated oiled or buttered frying pan as you normally would cook your pancakes.

My kids like to eat their pancakes with nutella, and sometimes I get lucky and they actually let me put peanut butter on their pancakes instead....but of course nutella is always their top choice...hahaha..
Hey, as long as they get some veggies in, I'm OK with their love for nutella :)

Veggie Oatmeal Pancakes

5 pouches (or 1 and 1/4 cups) oatmeal
1/2 tsp baking powder
2 pouches of stevia (1-2 Tbsp sugar to taste)
1 egg
1 C veggie juice/smoothies
Combine the oatmeal, baking powder, and sweetener in a bowl, add the egg and juice/smoothies and mix well. Heat an oiled or buttered pan and fry spoonfuls of the batter as you normally would fry your pancakes.

Here is a printable version of the recipe.


If you like my posts and recipes, feel free to share them with others, and if you click on my product links above Amazon may give me an ity bity commission.
Also, check back frequently for my weekly posts, where I share other ideas to incorporate more veggies into different recipes as well as reviews and discussions on various kitchen appliances or tools that I use the most to make healthier food options for my family.
This post may contain affiliate links

Monday, November 7, 2016

My Top 4 Must Have Kitchen Appliances for Eating Healthy With Picky Eaters

Eating healthy is often challenging and requires lots of preparations from picking out the ingredients to preparing each ingredient (this usually involves peeling, cutting, slicing, dicing, etc, etc) which can be rather time consuming when performed by hand. But with the right kitchen appliances or tools, preparing and eating healthy foods and snacks doesn’t have to be a tedious and time consuming process. Here I will share the list of my top 3 must have kitchen appliances for eating healthy with picky eaters. These are the must have kitchen kitchen appliances that I use the most to prepare healthy meals and snacks for my family.
  1. Ninja Nutri Blender System.

http://www.amazon.com/gp/product/B00RZV3THS/ref=as_li_tl?ie=UTF8&camp=1789&creative=9325&creativeASIN=B00RZV3THS&linkCode=as2&tag=mamaduckysnes-20&linkId=3CMA4IDSLJKO57WT
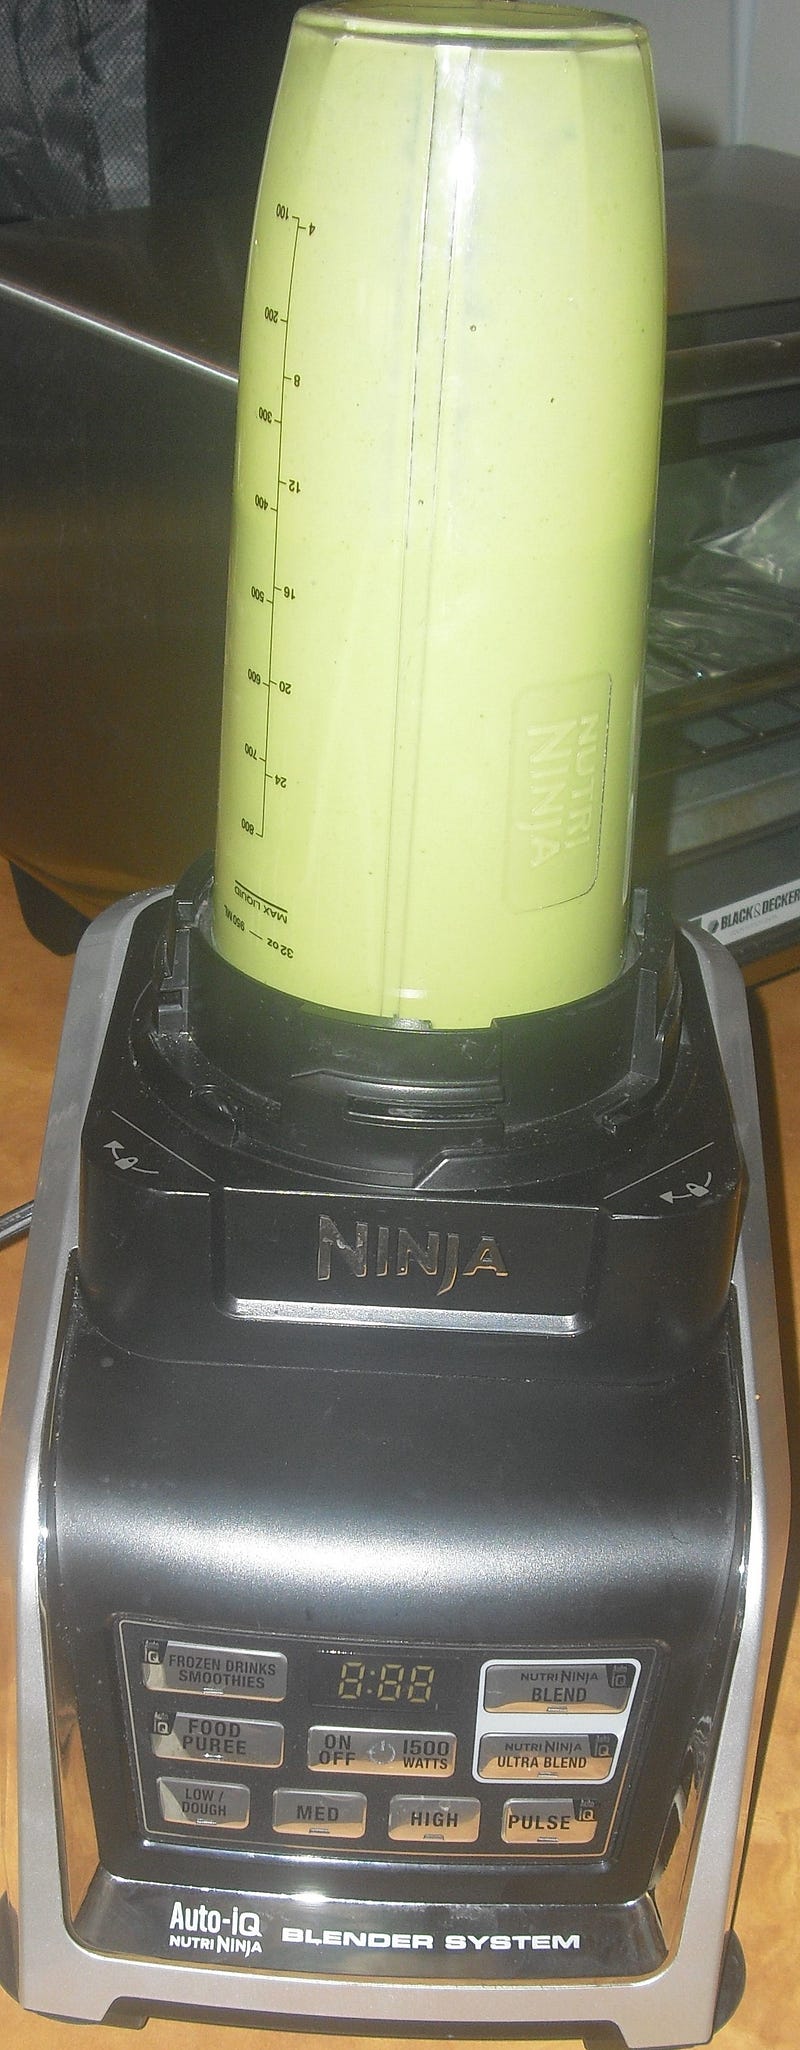
(Spinach mango baby food puree smoothie prepared in the Nutri Ninja Blender System)
This is by far my most frequently used kitchen appliance for making healthy recipes. I use this almost daily and it is definitely one of my must have kitchen appliances for eating healthy with picky eaters. My favorite part about this blender system is that it doesn't just come with a full size blender. The system comes with several attachments including a full size blender, a food processor, as well as 3 different cup blender attachments sizes. When I was first looking to buy a blender system, I explored many of the options available in the market, but I ultimately decided on this blender system because it gave me the most value for my money, as opposed to other blenders that didn’t come with other extra attachments. So far I’ve used my Ninja Nutri Blender system to make various healthy recipes from the obvious recipes such as smoothies, to some of the more unconventional recipes such as pancake/cookie/muffin batter, fruit and nut bars, cauliflower pizza crusts/ breadsticks and many more. I’ve had this kitchen appliance for a few years now and it was totally worth every cent I put into it.


https://www.amazon.com/gp/product/B001NZPP6U/ref=as_li_tl?ie=UTF8&camp=1789&creative=9325&creativeASIN=B001NZPP6U&linkCode=as2&tag=mamaduckysnes-20&linkId=c221722f1a293c34bdd62e23f48ed475
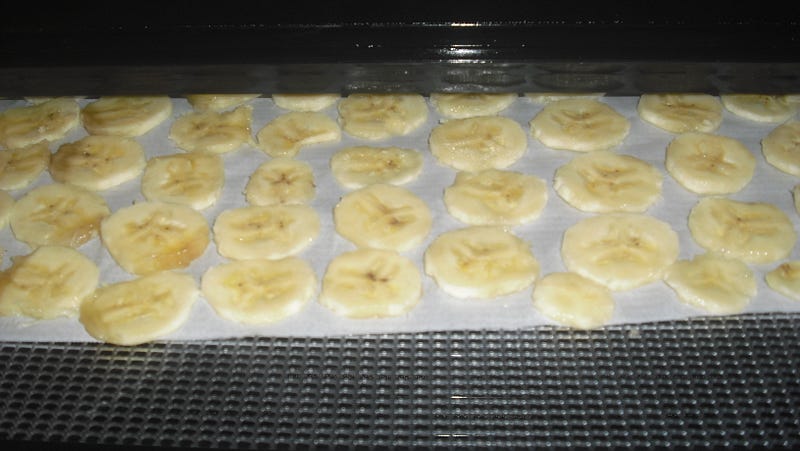
(Dehydrated banana snacks made in my 9-tray Excalibur dehydrator.)

The Excalibur dehydrator is such a versatile and multipurpose tool, it is definitely one of my must have kitchen appliances for eating healthy with picky eaters. I love how I can make all kinds of healthy recipes in it. Before I got myself the Excalibur, I used to have one of those small circular dehydrator which worked fine for the most part, but I’ve often come across problems of having to do multiple dehydrating batches due to its very small capacity, uneven food drying, and longer than normal drying times. With the Excalibur, I have never experienced any of those issues. Over these last few summer months, I’ve been using my Excalibur very often to dehydrate all kinds of fruits, vegetables, and herbs that were in season. I love that I have been able to stock up on produce and continue to have those in hand to make healthy recipes during the upcoming winter months. Perhaps our most favorite treat that I make with the dehydrator is my fruit and veggie leather roll up snacks. My kids who can usually spot anything healthy or green from a mile away didn't have a clue that there are vegetables in these leather roll ups. I’ve also made home made yogurt many times in the Excalibur with great success, as well as chicken jerky.


https://www.amazon.com/gp/product/B0175VTQ6U/ref=as_li_tl?ie=UTF8&camp=1789&creative=9325&creativeASIN=B0175VTQ6U&linkCode=as2&tag=mamaduckysnes-20&linkId=d0ab7994d685b1a6fe4efe4bf750f7f6
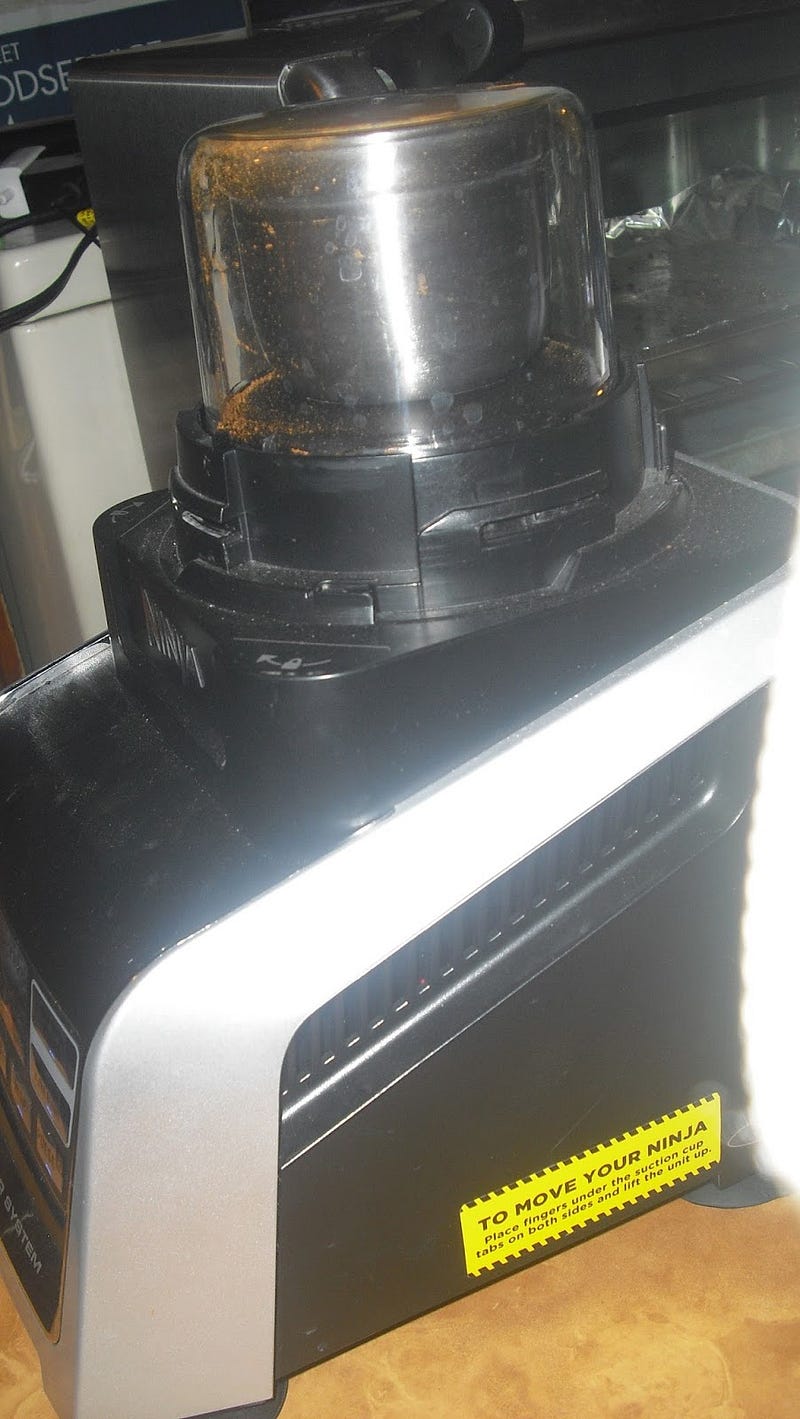
(Carrot powder made in my Ninja Spice Grinder)

This is an attachment that fits onto the ninja motor that is purchased separately. This spice grinder attachment is one of a newer addition to my collection of must have kitchen appliances for eating healthy with picky eaters, but it has definitely been used fairly frequently, and it has supported me in this new powder making craze I am currently in :). Many of the vegetable purees and herbs that I have dehydrated in the Excalibur have been turned into veggie powder with this spice grinder. For instance, when ginger as on sale several weeks ago, I bought a lot, dehydrated thin slices of it, then turned the dehydrated slices into powder. I now have a stock of powder ginger that I use very frequently in different recipes. I have also made yogurt powder, carrot powder, pumpkin powder, broccoli powder, spinach powder, and celery powder using this spice grinder, all of which are great ingredients to have on hand for healthy meals and snacks. Before purchasing this spice grinder I used a traditional mortar and pestle to make veggie powders and although I got some good biceps out of the process :) , it was definitely time consuming. Needless to say, I am extremely pleased to have the ninja spice grinder as part of my collection of must have kitchen appliances for endless possibilities of healthy recipes.


1.    4. KitchenAid Stand Mixer.
http://www.amazon.com/gp/product/B003OXNBYC/ref=as_li_tl?ie=UTF8&camp=1789&creative=9325&creativeASIN=B003OXNBYC&linkCode=as2&tag=mamaduckysnes-20&linkId=QW76A2FZRZWPDYRJ
      I absolutely love the KitchenAid stand mixer because of all the different attachments you can hook   onto it. Not only can you use the stand mixer for the usual mixer recipes such as batters, doughs, etc, but you can also use the different attachments to make all kinds of different healthy recipes. For example, the ice cream maker attachment is great to make healthy ice cream or sorbet recipes. I've also used the food grinder attachment to grind my own healthy meatballs, and the rotor slicer shredder attachment is great to cut thin slices of veggies for baked veggie chips. With the large variety of things you can do with it, my KitchenAid stand mixer is definitely one of my must have kitchen appliances for eating healthy with picky eaters.

If you like my posts and recipes, feel free to share them with others, and if you click on my product links above Amazon may give me an ity bity commission.


Also, check back frequently for my weekly posts, where I share other ideas to incorporate more veggies into different recipes as well as reviews and discussions on various must have kitchen appliances for eating healthy.

This post may contain affiliate links